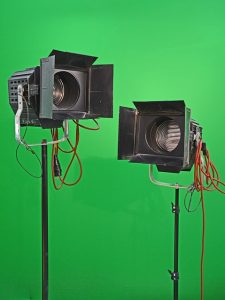
Video lighting can set the right mood.
Your video lighting equipment may be the most expensive part of your whole set up, so learning how to use and position it correctly for best effect is important before you start the camera rolling.
Lighting creates mood and provides depth to a subject. Ignoring it will be costly for the production value of your video.
There are 3 main components for the best lighting set up –though you can make do with 2 lights, we recommend making the space available for the third light because that’s the one that will give a professional feel to your video, as you will see below.
Lighting Basics
Firstly, ensure that all external lights are switched off. The whole lighting set up needs to be under your control and adjustable, so we don’t need any interference from other sources.
The best video lighting set ups use the 3 point system. That’s a key light, fill light and back light set up on the subject, to provide balanced lighting that gives shape and depth to the subject.
Key lights
The key light is the main light. It is the strongest and will be the hottest too. This creates a shadowy effect on the subject and may pronounce features like rings round the eyes or create a shadow under the nose, for example.
You should position the key light up high and just behind the camera where it will have a strong lighting effect.
Fill Lights
Fill lights are softer than the key lights and are usually positioned at the same level and off to one side of the camera. Their function is to take away the harsh shadow contrasts that the key lights create.
If you are using fluorescent lighting for your key lights you can also use that for the fill lights, with some of the bulbs removed to make the lighting softer. The fire-retardant fabric that clips over the front of the light will diffuse it so the light will look even.
You should find that using fill lighting creates some depth and character for the face of the subject in the video…. but something is still missing. It still looks rather flat without the third component.
Backlights
Backlights sit above and behind the subject usually. They are the final piece of the lighting jigsaw that really adds a professional quality to your video, by highlighting and giving depth to a subject’s bone structure and shape.
A single backlight adds a type of subtle glow around the subject and helps to separate it from the background, bringing it “forward” and adding dimension.
You can use quite soft LED lighting for the backlights, which are also cheaper than the fluorescent lights.
Play around with your lighting set up. Some of the variations are subtle when you change positions or intensities. Find a combination that accentuates what you want to accentuate and keep the focus on the message.
Of course there’s much more to great video making than your video lighting. You can find excellent tips on all aspects of professional quality video making in the Lights, Camera, Profits! workshop videos. Click here to learn more about it.


Lighting makes such a difference to any video. Well placed lighting gives a really professional look. Thanks for the informative instructions about how to use the lights you have to the best effect. I can see you pay attention to the lighting, as is evidenced by the videos throughout this blog!
Agreed. Videos produced with proper lighting are more enticing to watch because they exude a welcoming atmosphere 🙂 They also give the impression that they are well-planned.
It really takes a lot of testing to do especially for newbies in making videos for promoting their business. It is good that we have a guide to refer to, but it is also best if we have a contact with someone who can afford to come to our studio/office and provide professional services in case we need it.
That is a great idea, Nhil. But professional services would also mean professional fees…I hope their services do not cost much. With this blog, I am reminded of how my photographer friend plays with lighting to make his subject especially foods look fresh and tasty.